- Introduction
- How to Prepare for Battery Testing
- Types of Multimeters and Their Use
- Selecting the Right Multimeter
- How to Test with an Analog Multimeter
- How to Test with a Digital Multimeter
- Ensure Reliable Testing – Explore Our Refurbished Multimeters
- Basic Battery Testing Methods
- Battery Health Status Based on Voltage Readings
- How to Test for Voltage
- How to Test for Current
- How to Test for Internal Resistance
- How to Test Specific Battery Types
- How to Test AA and AAA Batteries
- How to Test a Lithium-ion Battery
- How to Test a Car Battery
- Advanced Testing Techniques
- Safety Precautions When Testing Batteries
- Maintenance and Storage of Batteries
- How to Troubleshoot Common Problems
- Inconsistent Readings
- Multimeter Errors
- Battery-Related Problems
- Calibration and Maintenance of Multimeters
- Stay Ahead with Calibrated Equipment
- Whenever You’re Ready, Here Are 5 Ways We Can Help You
You've just wrapped up the design phase of a critical project and moved on to testing your prototype. Everything seems perfect—until the device powers down unexpectedly. The deadline is looming, and you're left wondering what went wrong.
This scenario is all too familiar for engineers: a seemingly reliable battery fails to perform when it's needed most. The frustration isn't just about the malfunction; it's about the time and resources wasted. Often, the root of the problem isn't the battery itself but the lack of proper testing.
Knowing how to accurately test your batteries can save you from these headaches and ensure your projects stay on track. In this guide, we'll walk you through the steps to test any battery with a multimeter, helping you achieve accurate results and maintain the reliability of your devices.
How to Prepare for Battery Testing
To ensure accurate and effective battery testing, follow these initial steps:
- Identify the battery type and specifications:
- Determine the battery type (e.g., AA, AAA, lithium-ion, lead-acid).
- Check the battery’s voltage rating (usually printed on the battery or in the device’s manual).
- Note the battery’s capacity, typically measured in milliamp-hours (mAh) or amp-hours (Ah).
- Visually inspect the battery:
- Look for any physical damage, such as cracks or dents.
- Check for leaks or corrosion around the terminals, which can indicate the battery is compromised.
- Ensure the battery terminals are clean and free of debris.
- Set up the multimeter:
- Select the appropriate mode on the multimeter. For most batteries, this will be the DC voltage mode.
- Set the range higher than the battery's voltage. If the battery is 1.5V, set the range to at least 2V.
- Ensure the multimeter leads are correctly connected: the red lead to the positive terminal and the black lead to the negative terminal.
By following these steps, you’ll be well-prepared to conduct an accurate battery test and prevent potential issues that could affect your results.
Types of Multimeters and Their Use
When testing batteries, you can choose between analog and digital multimeters. Each type has its unique features, advantages, and disadvantages.
| Feature | Analog Multimeter | Digital Multimeter |
| Display | Needle on a scale | Digital readout |
| Accuracy | Lower, susceptible to parallax errors | Higher, precise readings |
| Ease of Use | Requires careful reading of scale | Easy to read, direct numerical value |
| Durability | More rugged and less sensitive to drops | Can be sensitive to impact |
| Cost | Generally cheaper | Can be more expensive |
| Additional Features | Limited | Often includes extra functions like auto-ranging, continuity test, etc. |
| Power Source | Does not require a battery | Requires a battery to operate |
Selecting the Right Multimeter
- Accuracy: Digital multimeters offer higher accuracy and are ideal for precise measurements.
- Range: Ensure the multimeter covers the voltage range of the batteries you intend to test.
- Additional features: Consider features like auto-ranging, continuity testing, and capacitance measurement.
- Reliability: Choose a multimeter from a reputable brand like Keysight with good reviews. Warranty options can provide peace of mind.
How to Test with an Analog Multimeter
- Set up the multimeter
- Select the DC voltage mode.
- Set the range higher than the expected battery voltage.
- Connect the probes
- Attach the red probe to the positive terminal.
- Attach the black probe to the negative terminal.
- Read the measurement
- Observe the needle movement.
- Ensure your eyes are directly in line with the needle to avoid parallax errors.
- Interpret the voltage by noting where the needle points on the scale.
- Compare with rated voltage
- Check if the measured voltage matches the battery’s rated voltage.
- A significant deviation indicates the battery may be weak or faulty.
How to Test with a Digital Multimeter
- Set up the multimeter
- Turn the dial to the DC voltage mode.
- Select a range higher than the battery’s voltage if the multimeter is not auto-ranging.
- Connect the probes
- Attach the red probe to the positive terminal.
- Attach the black probe to the negative terminal.
- Read the measurement
- Look at the digital display for the voltage reading.
- Ensure the reading is stable before recording the value.
- Compare with rated voltage
- Match the displayed voltage with the battery’s rated voltage.
- A lower than expected reading suggests the battery is weak or needs replacement.
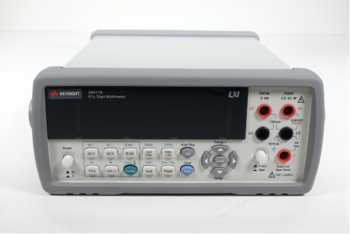
By understanding the types of multimeters and their specific uses, you can make informed decisions and ensure accurate battery testing, maintaining the reliability of your projects.
Ensure Reliable Testing – Explore Our Refurbished Multimeters
Basic Battery Testing Methods
Understanding basic battery testing methods will ensure your batteries are in optimal condition. Below, we'll cover how to test for voltage, current, and internal resistance.
Battery Health Status Based on Voltage Readings
| Voltage Reading | Battery Health Status | Description |
| Above Rated Voltage | Healthy | Battery is in excellent condition and fully charged. |
| At Rated Voltage | Healthy | Battery is in good condition and operating within expected parameters. |
| Slightly Below Rated Voltage | Weak | Battery is partially discharged and may need recharging or replacement soon. |
| 20-30% Below Rated Voltage | Weak | Battery is showing signs of wear, with reduced capacity and efficiency. |
| Significantly Below Rated Voltage (more than 30% below) | Dead | Battery is discharged or potentially damaged, requiring immediate replacement. |
How to Test for Voltage
- Set up the multimeter
- Turn the dial to the DC voltage mode.
- Set the range higher than the battery’s expected voltage if the multimeter is not auto-ranging.
- Connect the probes
- Attach the red probe to the positive terminal of the battery.
- Attach the black probe to the negative terminal of the battery.
- Read the voltage
- Observe the voltage reading on the multimeter display.
- Ensure the reading is stable before recording the value.
- Interpret the results
- Healthy battery: Voltage is at or slightly above the rated voltage.
- Weak battery: Voltage is slightly below the rated voltage.
- Dead battery: Voltage is significantly below the rated voltage.
How to Test for Current
- Set up the multimeter
- Turn the dial to the DC current (amperage) mode.
- Choose the appropriate current range.
- Configure the probes
- Connect the red probe to the multimeter’s current input.
- Connect the black probe to the common (COM) input.
- Connect the probes in series
- Disconnect one end of the battery from the circuit.
- Connect the red probe to the disconnected end of the battery.
- Connect the black probe to the circuit where the battery was disconnected.
- Read the current
- Observe the current reading on the multimeter display.
- Ensure the reading is stable before recording the value.
- Interpret the results
- A healthy battery will deliver a current close to its rated capacity.
- A weak or dead battery will show significantly lower current.
How to Test for Internal Resistance
- Set up the multimeter
- Turn the dial to the resistance (ohm) mode.
- Connect the probes
- Attach the red probe to the positive terminal of the battery.
- Attach the black probe to the negative terminal of the battery.
- Read the resistance
- Observe the resistance reading on the multimeter display.
- Ensure the reading is stable before recording the value.
- Interpret the results
- Low internal resistance: Indicates a healthy battery with efficient power delivery.
- High internal resistance: Indicates a weak or deteriorating battery, affecting performance and longevity.
Understanding these basic testing methods allows you to assess battery health effectively, ensuring your devices remain reliable and perform optimally.
How to Test Specific Battery Types
Different types of batteries require specific procedures for accurate testing. Below, we'll cover how to test AA and AAA batteries, lithium-ion batteries, and car batteries.
How to Test AA and AAA Batteries
- Set up the multimeter
- Turn the dial to the DC voltage mode.
- Set the range higher than the expected voltage (typically around 2V).
- Connect the probes
- Attach the red probe to the positive terminal of the battery.
- Attach the black probe to the negative terminal of the battery.
- Read the voltage
- Observe the voltage reading on the multimeter display.
- Ensure the reading is stable before recording the value.
- Interpret the results
- Healthy battery: Voltage between 1.5V and 1.6V.
- Weak battery: Voltage between 1.2V and 1.4V.
- Dead battery: Voltage below 1.2V.
How to Test a Lithium-ion Battery
Lithium-ion batteries are widely used in electronics and must be tested for safety and performance.
- Set up the multimeter
- Turn the dial to the DC voltage mode.
- Set the range higher than the expected voltage (typically around 20V).
- Precautions
- Ensure the battery is not connected to any device.
- Handle the battery carefully to avoid short circuits or damage.
- Connect the probes
- Attach the red probe to the positive terminal of the battery.
- Attach the black probe to the negative terminal of the battery.
- Read the voltage
- Observe the voltage reading on the multimeter display.
- Ensure the reading is stable before recording the value.
- Interpret the results
- Healthy battery: Voltage between 3.7V and 4.2V.
- Weak battery: Voltage between 3.0V and 3.6V.
- Dead battery: Voltage below 3.0V.
How to Test a Car Battery
- Preparatory steps
- Turn off the car and ensure all electrical components are off.
- Clean the battery terminals to remove any corrosion or dirt.
- Set up the multimeter
- Turn the dial to the DC voltage mode.
- Set the range higher than the expected voltage (typically around 20V).
- Connect the probes
- Attach the red probe to the positive terminal of the battery.
- Attach the black probe to the negative terminal of the battery.
- Read the voltage
- Observe the voltage reading on the multimeter display.
- Ensure the reading is stable before recording the value.
- Interpret the results
- Healthy battery: Voltage between 12.4V and 12.7V.
- Weak battery: Voltage between 12.0V and 12.3V.
- Dead battery: Voltage below 12.0V.
- Perform a load test (Optional)
- Use a battery load tester to apply a load and measure the voltage drop.
- A healthy battery should maintain a voltage above 10V during the load test.
By following these procedures for testing different types of batteries, you can ensure accurate readings and maintain the performance and safety of your devices.
Advanced Testing Techniques
Advanced battery testing techniques provide deeper insights into battery health and performance beyond basic voltage and current measurements.
- Load testing: This method applies a controlled load to the battery, simulating real-world conditions to assess capacity and health. Connect a load tester to the battery terminals, apply a load matching the battery’s rated capacity, and measure the voltage drop over time. Load testing identifies weak or failing cells and evaluates voltage stability under operational conditions.
- Capacity testing: This technique measures the total charge a battery can hold by fully discharging it and measuring the total energy output. Fully charge the battery, discharge it at a constant current until it reaches its cut-off voltage, and calculate the capacity (mAh or Ah) based on the total discharge time. Capacity testing determines the battery’s true capacity compared to its rated capacity, providing a direct measure of charge-holding capability.
- Impedance spectroscopy: This advanced method measures the battery's internal impedance at different frequencies to provide insights into internal chemical processes and potential degradation. Use an impedance analyzer to apply an AC signal to the battery, measure the response at various frequencies, and analyze the impedance spectrum for internal resistance and reactance. Impedance spectroscopy detects subtle changes in internal components, predicts the remaining useful life, and identifies early signs of failure.
These advanced techniques offer a comprehensive understanding of battery condition and performance, ensuring reliability and efficiency in your applications.
Safety Precautions When Testing Batteries
Safety is paramount when testing batteries to prevent accidents and ensure accurate results.
General Safety Tips
- Wear protective gear, including safety glasses and gloves.
- Avoid contact with live circuits to prevent electric shock.
- Work in a well-ventilated area to disperse any harmful fumes.
- Keep a fire extinguisher nearby, especially when testing large or high-capacity batteries.
- Ensure your testing equipment is reliable and in good condition.
Specific Precautions for Lithium-ion Batteries
- Handle with care to avoid puncturing or short-circuiting.
- Do not expose to high temperatures or open flames.
- Use a battery management system (BMS) to monitor and protect the battery.
- Store in a cool, dry place away from flammable materials.
Specific Precautions for Lead-acid Batteries
- Wear acid-resistant gloves and eye protection to guard against spills.
- Handle with care to prevent tipping or leaking of sulfuric acid.
- Neutralize acid spills with baking soda and clean thoroughly.
- Charge in a well-ventilated area to avoid the buildup of explosive hydrogen gas.
- Disconnect the negative terminal first to prevent short circuits.
By following these safety precautions, you can ensure a safe testing environment while maintaining the reliability and longevity of your equipment.
Maintenance and Storage of Batteries
Proper maintenance and storage are essential for prolonging battery lifespan and ensuring reliable performance. Follow these guidelines:
- Charging and discharging: Always follow the manufacturer's recommendations for charging cycles to avoid overcharging or deep discharging. Use chargers that match the battery’s specifications to prevent damage, and try to recharge batteries when they reach around 20-30% capacity, avoiding complete discharge.
- Storage: Store batteries in a cool, dry place, ideally at temperatures between 15°C and 25°C (59°F to 77°F), away from direct sunlight and heat sources to prevent degradation. Store batteries at a partial charge (around 50%) for long-term storage and ensure terminals are clean and free from corrosion.
- Regular testing and maintenance: Conduct regular voltage and capacity tests to monitor battery health, and perform load tests periodically to ensure batteries perform well under real-world conditions. Clean battery terminals and connectors to maintain good electrical contact.
- Environmental impact: Follow local regulations for battery disposal to prevent environmental contamination and recycle batteries through authorized programs to recover valuable materials and reduce landfill waste. Opt for rechargeable batteries over disposable ones to minimize environmental impact.
- Sustainable practices: Use energy-efficient chargers to reduce power consumption and implement proper battery management systems (BMS) to extend battery life and improve performance. Educate users on sustainable battery practices to promote environmentally friendly usage and disposal.
Adhering to these guidelines will help you extend the lifespan of your batteries, ensure consistent performance, and minimize environmental impact, contributing to sustainable battery usage.

How to Troubleshoot Common Problems
Battery testing can present various challenges, but understanding common issues and their solutions can help you troubleshoot effectively.
Inconsistent Readings
- Potential causes: Inconsistent readings often stem from poor contact between the multimeter probes and battery terminals, dirty or corroded terminals, or fluctuating temperature conditions affecting battery performance.
- Solutions: Ensure clean and secure contact between probes and terminals, clean the battery terminals using a soft cloth or brush, and perform tests in a stable, controlled environment to minimize temperature effects.
Multimeter Errors
- Potential causes: Common multimeter errors include incorrect settings, a weak or depleted multimeter battery, and damaged probes or internal circuitry.
- Solutions: Double-check and set the multimeter to the correct mode and range, replace the multimeter battery if necessary, and inspect and replace damaged probes. If internal issues are suspected, consider professional repair.
Battery-Related Problems
- Potential causes: Batteries near the end of their lifespan may provide inconsistent performance. Manufacturing defects or internal short circuits within the battery, as well as environmental factors like extreme temperatures or humidity, can also cause problems.
- Solutions: Replace old or degraded batteries, test multiple batteries to rule out defects and confirm consistent results, and store and test batteries in suitable environmental conditions.
Calibration and Maintenance of Multimeters
- Importance of calibration: Regular calibration ensures the multimeter provides accurate readings, detects and corrects measurement accuracy drift, and improves reliability.
- Benefits of calibration services: Calibration services extend the life of the multimeter, provide detailed reports and adjustments, and ensure the device meets industry standards.
- Tips for calibration: Follow the manufacturer’s recommended calibration schedule, use accredited calibration services, and record calibration dates and results to maintain a consistent calibration history.
By addressing these common issues and regularly calibrating your multimeter, you can ensure accurate and reliable battery testing results. Regular maintenance and proper troubleshooting techniques will help you diagnose problems effectively, leading to better battery management and performance.
“For all used equipment, I offer my clients calibration and 1 year warranty.” – Keysight Account Manager
Stay Ahead with Calibrated Equipment
Remember that moment when your equipment failed unexpectedly in the middle of a crucial project? Regular maintenance and proper testing can prevent such issues.
We've discussed how to test batteries effectively, troubleshoot common problems, and the importance of advanced testing techniques and calibration. By following these guidelines, you ensure your batteries perform reliably, prolong their lifespan, and maintain the accuracy of your testing equipment.
Our premium used multimeters, oscilloscopes and more make reliable test results accessible and affordable, helping you stay ahead in your projects.
Invest in quality testing equipment and regular calibration services to avoid unexpected failures and keep your work on track. With our solutions, you can achieve consistent, reliable performance and peace of mind.
Whenever You’re Ready, Here Are 5 Ways We Can Help You
- Browse our premium used network analyzers, oscilloscopes, signal analyzers and waveform generators.
- Call tech support US: 1 800 829-4444
Press #, then 2. Hours: 7am – 5pm MT, Mon– Fri - Talk to our sales support team by clicking the icon (bottom right corner) on every offer page
- Create an account to get price alerts and access to exclusive waitlists.
- Talk to your account manager about your specific needs

