- Introduction
- The Best Multimeters now on Sale
- Understanding Capacitors and Their Role in Electronics
- The Core Functionality: Storing Energy
- Types Of Capacitors & Their Applications
- Capacitors: The Heartbeat of Electronic Devices
- Digital Multimeters: An Essential Tool for Testing Capacitors
- Why Digital Multimeters?
- The Capacitor Testing Role of Digital Multimeters
- Multimeter Safety Precautions
- Capacitor Testing in Practice
- Safety Precautions When Testing Capacitors
- Discharge Your Capacitor First
- Use Insulated Tools
- Handle With Care
- Identifying Different Types of Capacitors
- Ceramic Capacitors
- Film Capacitors
- Electrolytic Capacitors
- Tantalum Capacitors
- Super Capacitors
- Preparing Your Digital Multimeter for Capacitor Testing
- Choose the Correct Setting
- Multimeter Probe Placement
- Step-by-Step Guide to Testing a Capacitor with a Digital Multimeter
- Setting Up Your Multimeter for Capacitor Testing
- Capacitor Fault Symptoms and Diagnostics
- Interpreting Your Results
- Understanding the Results of Your Capacitor Test
- The Significance of Measured Value
- Analyzing 'Open' or 'Short' Readings
- In-Circuit Vs Out-of-Circuit Testing
- Understanding ESR Readings
- Common Errors to Avoid When Testing Capacitors
- Misinterpreting Capacitor Polarity
- Incorrect Multimeter Settings
- Failing To Discharge The Capacitor Before Testing
- Omitting Visual Inspection Of The Capacitor
- Ignoring Environmental Factors
- Using Damaged Or Low-Quality Multimeters
- Advanced Techniques for Capacitor Testing
- The Impedance Method
- The Time Constant Method
- FAQs About How to Test Capacitor With a Digital Multimeter
- FAQs About How to Test Capacitor With a Digital Multimeter
- How do you check capacitance with a multimeter?
- How do you test an AC capacitor with a digital multimeter?
- What is the capacitor symbol on a digital multimeter?
- Conclusion
- Whenever You’re Ready, Here Are 5 Ways We Can Help You
Picture this: you've been working away at your electronics project for weeks, and it's finally time to test. You flip the switch, but something's off.
The circuits aren't humming as they should be, and instead of the sweet success you'd envisioned, there's just frustration. It seems like an insurmountable problem — until you reach for your trusty digital multimeter.
Within moments, the culprit is revealed: a faulty capacitor! A simple issue but one that could have taken days or even weeks to find without the digital multimeter.
Intrigued? Do you want to master your multimeter like a pro? Then keep on reading!
The Best Multimeters now on Sale
Understanding Capacitors and Their Role in Electronics
What exactly is a capacitor? And why do we need them?
A capacitor is an electronic element that holds and releases electrical energy, like a miniature battery within the circuitry of your device.
The Core Functionality: Storing Energy
This ability to store energy makes capacitors essential for the smooth operation of many electronic devices. They provide bursts of power when needed—like during startup—and stabilize voltage by absorbing and releasing charge quickly.
Capacitors can block direct current (DC) while allowing alternating current (AC) to pass through—a property vital in applications such as audio signal processing or radio tuning circuits.
Types Of Capacitors & Their Applications
There isn't just one type of capacitor – they come with various specifications suited for different applications. The common types include:
- Electrolytic capacitors: used primarily in power supply filters due to their high capacitance-to-volume ratio.
- Ceramic disk capacitors: frequently used because they're compact and inexpensive.
- Tantalum capacitors: known for their excellent stability but higher cost.
- Film or paper dielectric capacitors: used where low losses are crucial.
Capacitors: The Heartbeat of Electronic Devices
From power supplies to radio transmitters, capacitors are everywhere in electronics. They're the heartbeat of flash photography, providing the sudden energy discharge needed for a camera flash. In audio systems, they help filter out noise and maintain signal integrity.
Capacitors play a crucial role in the regenerative braking systems of electric cars. They act as temporary power sources during short blackouts in UPS (Uninterrupted Power Supply) systems.
| Key Takeaway |
|---|
| Capacitors store and release electrical energy in devices. They give power boosts when needed and stabilize voltage. Unique in blocking DC while allowing AC to pass through, they're key in audio signal processing or radio tuning circuits. |
Digital Multimeters: An Essential Tool for Testing Capacitors
A digital multimeter (DMM) is to an electrical engineer what a stethoscope is to a doctor. Just as the medical tool lets doctors diagnose patients, DMMs help engineers determine how well electronic components function.
The incredible range of applications for DMMs cannot be understated. They measure not just voltage, but also current and resistance—a trio crucial in any electronics troubleshooting scenario.
Why Digital Multimeters?
So why stick with DMMs when there are other tools available? The answer lies in their precision and flexibility. Digital multimeters display readings in digits, eliminating the guesswork that often comes with interpreting analog scales. This accuracy makes them indispensable when dealing with sensitive electronics where even slight errors can lead to significant problems.
The Capacitor Testing Role of Digital Multimeters
In addition to basic functions like measuring voltage, current, and resistance, many modern DMMs come equipped with advanced features—one being capacitor testing. It sends small charges through the component under test and gauges its ability to store energy or filter out noise within circuits.
This feature adds another layer of practicality to already versatile digital multimeters making them essential for maintaining the health and performance of electronic systems.
Multimeter Safety Precautions
Safety should be the top priority when using a digital multimeter. Basic precautions include checking your meter for any signs of damage before use and ensuring you're wearing proper protective equipment.
Remember to always disconnect capacitors from their circuits and let them discharge fully before testing—capacitors store energy that can lead to nasty shocks if not handled carefully.
Capacitor Testing in Practice
Testing capacitors is pretty simple. All you need to do is set your DMM to 'Capacitance' mode and then get started.
| Key Takeaway |
|---|
| Digital multimeters (DMMs) are the stethoscopes of electrical engineers, essential for checking the health of electronic components. They're prized for their accuracy and flexibility as they measure voltage, current, resistance, and even test capacitors' energy storage or noise filtering capabilities. But don't forget – safety is paramount. Always inspect your DMM prior to using it and make sure it's disconnected when not in use. |
Safety Precautions When Testing Capacitors
Testing capacitors with a digital multimeter is an essential skill for any electrical engineer. But it's not just about knowing how to use the tool—you need to understand how to use it safely. Let's explore some critical safety guidelines.
Discharge Your Capacitor First
Before you even start testing, make sure your capacitor is fully discharged. A charged capacitor can give off a potentially dangerous shock. You can discharge most capacitors by using a resistor across the terminals—but be careful. Some larger capacitors hold their charge longer and may require more time or specific tools to discharge completely.
Use Insulated Tools
Whenever possible, use insulated tools when working with electronics—especially if there's potential for electric shock, like when discharging or testing capacitors. This simple step helps protect against accidental shocks.
Handle With Care
Capacitors are delicate electronic components that should be handled carefully at all times, especially during tests which might involve electricity or heat exposure.
Digital Multimeters and Safety Settings
- Always ensure that you've selected the right setting for what you're measuring (for instance, resistance).
- Remember to use the correct input jacks on your multimeter. Using the wrong ones can damage both your meter and the device you're testing.
Understand Your Multimeter's Limitations
Digital multimeters are versatile tools, but they have their limitations. Knowing these limits is crucial for safe operation.
For example, some digital multimeters aren't designed to handle high voltage or current levels—pushing beyond these boundaries could result in a dangerous situation.
| Key Takeaway |
|---|
| Testing capacitors with a digital multimeter is more than just skill—it's about safety. First, discharge your capacitor to avoid shocks. Use insulated tools for added protection and handle capacitors carefully—they're not toys. Be sure to understand your multimeter's settings and limitations before you start testing. |
Identifying Different Types of Capacitors
It’s important to recognize the diverse varieties of capacitors as they may necessitate somewhat different testing approaches.
Ceramic Capacitors
Ceramic capacitors are commonly used because they are cost-effective and small in size. They're non-polarized, meaning you can connect them either way around without worrying about polarity issues. Ceramic capacitors are great for applications that require a rapid response, such as RF circuits or audio amplifiers, due to their exceptional frequency performance.
Film Capacitors
Film capacitors use plastic film as their dielectric material which makes them durable against temperature fluctuations but larger in size compared to ceramic ones. They're often found in power supply circuits where stable capacitance over various conditions is essential.
Electrolytic Capacitors
When storing large amounts of charge, electrolytic capacitors stand out from the rest. However, unlike ceramic and film counterparts, these components are polarized, so proper connection orientation is critical during installation or testing procedures.
Tantalum Capacitors
Tantalum capacitors are a subtype of electrolytic capacitors. They provide superior stability & longevity when compared with other varieties but at a higher cost making them a good choice for precision devices.
Super Capacitors
Also known as ultra-capacitors or double-layer capacitors, supercapacitors can store an immense amount of energy compared to standard types. They are often used in power-hungry applications such as electric vehicles or backup power supplies.
Preparing Your Digital Multimeter for Capacitor Testing
Before you start testing a capacitor, it's essential to get your digital multimeter ready. The right setup can make the process smoother and give more accurate results.
Choose the Correct Setting
Firstly, ensure your digital multimeter is set to measure capacitance. This setting is often indicated by an 'F' or 'Farad', which is the unit of measurement for capacitance. If your device doesn't have this feature, don’t worry. You can still test capacitors using resistance mode; however, keep in mind that this method may not be as precise.
Multimeter Probe Placement
Placement of probes matters while measuring capacitors using a digital multimeter – incorrect placement might lead to false readings or even damage your device.
| Type of Capacitor | Type of Capacitor | Additional Info |
|---|---|---|
| Polarized (Electrolytic) | Red probe on positive, black on negative | Used in power supplies and filtering; sensitive to voltage polarity. |
| Non-Polarized | Probe polarity is not significant | Commonly used in timing, filtering, and coupling circuits; no polarity concern. |
| Ceramic | Probe polarity is not significant | Ideal for high-frequency applications like RF circuits. |
| Tantalum | Red probe on positive, black on negative | Higher capacitance per volume than electrolytic capacitors; polarized. |
| Film Capacitors | Probe polarity is not significant | Used for noise suppression, power film applications; stable over time. |
Step-by-Step Guide to Testing a Capacitor with a Digital Multimeter
Setting Up Your Multimeter for Capacitor Testing
1. Safety first: Ensure that all power to the circuit is turned off and the capacitor is fully discharged before beginning. Capacitors can hold a charge even when disconnected from power.
2. Remove the capacitor: Carefully remove the capacitor from its circuit. Testing the capacitor while it's still in the circuit can result in inaccurate readings and potential damage to the capacitor or the circuit.
3. Prepare the multimeter: Set your multimeter to the appropriate capacitance measurement setting. If your multimeter doesn't have this setting, set it to measure resistance (Ohm setting).
4. Connect the probes: Attach the red probe to the positive terminal and the black probe to the negative terminal of the capacitor. For non-polarized capacitors, the probe polarity is not significant.
5. Observe the reading:
- If measuring capacitance: Observe the reading on the multimeter's display. A rapid increase in the reading indicates a higher capacitance value.
- If measuring resistance: Watch for the resistance reading to initially show a low resistance, then gradually increase and stabilize, indicating the capacitor is charging. A capacitor that doesn't change resistance may be faulty.
6. Record the results: Note down the readings from the multimeter. Compare these values to the specifications of the capacitor to determine if it's functioning correctly.
7. Check for short circuits: After measuring the capacitance, it's also a good idea to check for a short circuit. Set the multimeter to the continuity setting and connect the probes to the capacitor terminals. A continuous beep or a very low resistance reading indicates a short circuit.
8. Visual inspection: Finally, visually inspect the capacitor for any signs of damage, such as bulging, leaking, or burn marks, which can indicate a faulty capacitor.
Remember, accurate testing depends on a good understanding of the capacitor type and the proper use of the multimeter. If you're unsure or the capacitor is part of a high-voltage system, it may be safer to consult a professional.
Capacitor Fault Symptoms and Diagnostics
| Symptom of Fault | Diagnostic Step or Multimeter Reading | Possible Cause |
|---|---|---|
| No reading or very low reading | Measure capacitance or resistance | Capacitor has lost its capacitance; possible open circuit |
| Reading does not stabilize | Observe resistance change over time | Faulty dielectric or internal damage |
| Continuous beep in continuity test | Perform a continuity test | Short circuit within the capacitor |
| Reading much higher than expected | Measure capacitance | Capacitor may have internal shorting or other damage |
| Bulging or leaking | Visual inspection | Physical damage, overvoltage, or aging |
| Burn marks | Visual inspection | Overheating, overvoltage, or electrical overstress |
| Capacitor gets hot during operation | Observe during powered operation | Excessive ESR or current leakage |
Interpreting Your Results
The readout on a digital multimeter gives us key insights into whether the capacitor is healthy or not. If no reading appears at all during the testing phase, then the capacitor might be damaged. If the reading is substantially lower than what's marked on the capacitor, it could be a sign that it has been weakened with age and might need to be changed.
| Key Takeaway |
|---|
| When testing capacitors with a digital multimeter, start by setting up your tool to measure capacitance and make sure the capacitor is fully discharged. Carefully remove it from its circuit before connecting each probe of your multimeter to one terminal. Keep an eye on how fast charge builds up – this can give you insight into the health of your component. |
Understanding the Results of Your Capacitor Test
Once you've tested a capacitor using a digital multimeter, it's crucial to understand what those results mean. The measurements can give you insight into the health and functionality of your capacitor.
The Significance of Measured Value
When testing capacitors, pay attention to the measured value displayed on your digital multimeter. This value is typically expressed in microfarads (µF). Compare this number with the rating printed on the capacitor itself – they should be within 5% to 10% range for an ideal functioning component.
- If there's a big difference from that range, it could mean your capacitor isn't performing as anticipated.
- A lower reading might suggest wear or internal damage while higher readings may imply overuse or overheating issues.
Analyzing 'Open' or 'Short' Readings
'Open' and 'short' are two other potential outcomes when testing capacitors. If your multimeter displays an infinite resistance reading (often shown as "OL"), then we call this state an open circuit condition – meaning no current is flowing through the device due to internal breakdowns.
If there’s zero resistance showing up, implying unrestricted current flow across terminals – that signifies short-circuiting within its structure caused by some form of malfunctioning like excessive voltage surges causing dielectric breakdowns inside.
In-Circuit Vs Out-of-Circuit Testing
The results of your capacitor test might vary depending on whether you're testing it in-circuit or out-of-circuit. For a more accurate assessment of a capacitor's health, it is better to remove the component from its circuit and then perform an isolated check.
Testing capacitors while they are still connected within circuits may give misleading results due to interactions with other components. This method should only be utilized when absolutely necessary.
Understanding ESR Readings
Equivalent Series Resistance (ESR) is a key parameter in the performance of capacitors, particularly in high-frequency applications. ESR represents the internal resistance of a capacitor when it is operating at a certain frequency. It is not a static value; rather, it varies with frequency and temperature.
In practical terms, a capacitor with a lower ESR will have better performance, especially in power supply circuits and high-speed digital applications. A high ESR can lead to inefficiencies and heat generation within the circuit, potentially affecting the overall performance and reliability.
In applications like smoothing ripples in power supplies or in audio applications, the ESR of capacitors can significantly impact the effectiveness of the filtering. Lower ESR values ensure that the capacitor can handle rapid changes in voltage without significant losses.
| Key Takeaway |
| If you get an 'open' reading, it means there's a break in the circuit inside. On the other hand, a 'short' signifies that two points which should be separate are connected. This could cause issues in your device's performance or even lead to damage over time. |
Common Errors to Avoid When Testing Capacitors
Errors can occur when testing capacitors if not done correctly. Let's delve into the common mistakes you need to avoid.
Misinterpreting Capacitor Polarity
One frequent error is misreading or ignoring capacitor polarity when dealing with polarized capacitors like electrolytic types. This mistake can lead to inaccurate measurements or even damage your device. Always remember that the negative terminal of these capacitors should connect to the lower potential.
Incorrect Multimeter Settings
Using incorrect settings on your multimeter can also skew results, causing you either to misdiagnose a healthy capacitor as faulty or overlook an actual issue. Make sure you've set your digital multimeter to its capacitance measurement mode before testing.
Failing To Discharge The Capacitor Before Testing
Another critical error often made is failing to discharge the capacitor before conducting tests; this poses both accuracy issues and safety risks. Even disconnected from power sources, capacitors retain charge which could result in false readings or electric shock during handling. Learn more about discharging procedures here.
Omitting Visual Inspection Of The Capacitor
While relying on tools for diagnostic work makes sense, don't neglect simple visual inspections. Often signs of wear such as bulging tops/bottoms or leaking fluid are clear indicators that a capacitor needs replacement despite what numerical values may suggest.
Ignoring Environmental Factors
Environmental factors like temperature can significantly affect capacitor performance. For example, a high-temperature environment could cause capacitors to fail prematurely or give incorrect readings during testing. So, ensure your tests are conducted in suitable environments for accurate results.
Using Damaged Or Low-Quality Multimeters
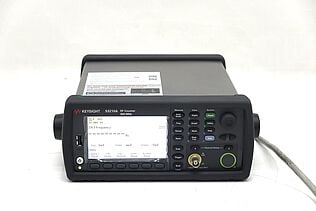
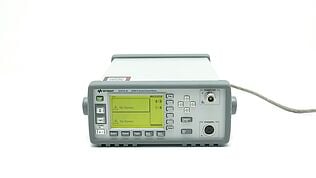
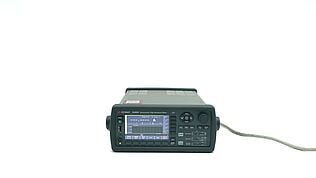
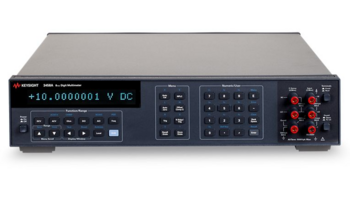
Finally, remember this: the quality of your multimeter is crucial. It's what helps you get precise results when testing capacitors. Choosing a Keysight multimeter ensures accuracy, durability, and advanced features, essential for reliable and safe electrical testing. Our range of multimeters is designed for both professional and hobbyist use, offering the best in precision and quality.
| Key Takeaway |
| Testing capacitors with a digital multimeter can be tricky, but avoidable errors like misinterpreting capacitor polarity, using incorrect multimeter settings, and forgetting to discharge the capacitor before testing can lead to inaccuracies. Don't skip visual inspections or ignore environmental factors. And remember – the quality of your multimeter matters! |
Advanced Techniques for Capacitor Testing
Just like a camera lens needs to be in perfect condition to capture sharp and clear photos, capacitors need regular testing with advanced techniques to ensure they're functioning at their best. By mastering these techniques, you can make sure your electronics perform reliably and last longer.
The Impedance Method
The impedance method is an effective way of measuring the capacitance value as well as the equivalent series resistance (ESR). This technique gives accurate results even when dealing with high-frequency signals or low-impedance capacitors.
It's crucial not only to understand how this test works but also why it’s important – similar to knowing both how and why we use different lenses on our cameras depending on lighting conditions.
To measure a capacitor's impedance using a digital multimeter (DMM) and a function generator, follow these steps:
- Set DMM: Configure your DMM to measure AC voltage.
- Connect function generator: Attach your function generator to the capacitor, ensuring it outputs a steady sinusoidal signal.
- Connect DMM leads: Link one DMM lead to each capacitor terminal.
- Adjust and record: Start with low frequency and increase gradually. Keep the amplitude constant and note the DMM's voltage readings at each frequency.
- Find resonance: Identify the resonance frequency by observing a peak in voltage.
- Calculate impedance: Using Ohm's Law: Z = V/I where I is current input into circuit.
The Time Constant Method
Another popular technique for checking capacitor health is through determining its time constant (TC), which directly relates to capacitance (C) given known resistance (R) via TC=RC formula.
- Discharge the capacitor: To avoid inaccurate readings or potential hazards, ensure the capacitor is fully discharged before you begin.
- Prepare the circuit: Connect the discharged capacitor to a resistor with a known resistance value (R).
- Apply DC voltage: Hook up a DC voltage source to the circuit comprising the capacitor and resistor.
- Start timing: As soon as you apply the DC voltage to the circuit, start a timer. This marks the beginning of the charging process for the capacitor.
- Monitor voltage build-up: Using your digital multimeter (DMM), monitor the voltage across the capacitor.
- Identify 63% voltage level: Keep an eye on the voltage level; stop the timer when it reaches 63% of the applied DC voltage. The time elapsed at this point is one time constant (TC).
- Repeat for accuracy: To ensure accuracy, repeat the process several times. Each iteration should start with discharging the capacitor.
- Calculate average TC: Average your time constant readings to get a more precise measurement of the capacitor's time constant.
- Analyze results: Compare the calculated time constant with the expected TC (calculated as TC=R×C, where C is the capacitance and R is the resistance). A significant deviation could indicate a problem with the capacitor.
By following these steps, you can effectively determine the health of a capacitor through its time constant, providing insight into its performance and lifespan.
| Key Takeaway |
|---|
| Constant Method is where you charge the capacitor through a known resistor and measure the time it takes to reach about 63.2% of its final voltage. It's like timing your camera shutter speed to capture that perfect shot. |
FAQs About How to Test Capacitor With a Digital Multimeter
How do you check capacitance with a multimeter?
Select 'capacitance' on your digital multimeter, connect it to the capacitor and read off the value. If it varies significantly from what's expected, there may be an issue.
How do you test an AC capacitor with a digital multimeter?
To test an AC capacitor, first discharge it safely, then set your multimeter to measure resistance. Connect probes across terminals; any sudden spike indicates good health but constant high or zero resistance points towards faulty capacitors.
What is the capacitor symbol on a digital multimeter?
The symbol for capacitance on most digital multimeters resembles two T’s facing each other – think about two parallel plates.
Conclusion
Your digital multimeter isn’t just another tool. It’s your diagnostic lifeline when things go haywire with your project. Remember to follow all safety precautions. They’re not suggestions; they're important steps for safe capacitor testing.
Remember: practice makes perfect! Avoiding common errors will ensure your results are accurate every time. And as you gain more confidence, explore advanced techniques too!
Whenever You’re Ready, Here Are 5 Ways We Can Help You
- Browse our premium used network analyzers, oscilloscopes, signal analyzers and waveform generators.
- Call tech support US: 1 800 829-4444. Press #, then 2. Hours: 7 am – 5 pm MT, Mon– Fri.
- Talk to our sales support team by clicking the icon (bottom right corner) on every offer page
- Create an account to get price alerts and access to exclusive waitlists
- Talk to your account manager about your specific needs.

