- Introduction
- Why Do We Need to Test Capacitors?
- Reliable Results Start with Reliable Tools
- How to Safely Discharge a Capacitor
- 9 Methods to Test a Capacitor
- Method 1: Visual Inspection
- Method 2: Use a Multimeter with Capacitance Setting
- Method 3: Use a Multimeter without Capacitance Setting
- Method 4: Use a Voltmeter
- Method 5: Test by Measuring the Time Constant
- Method 6: Use an ESR Meter
- Method 7: Leakage Current Test
- Method 8: Use a Capacitor Tester
- Method 9: Traditional Shorting Method (For Professionals Only!)
- How to Choose the Right Method for Your Capacitor
- Troubleshooting Tips
- Capacitor Maintenance and Handling
- Ensure Capacitor Efficiency and Reliability with Expert Testing
- Shop For Reliable Tools With Big Discounts
- Whenever You’re Ready, Here Are 5 Ways We Can Help You
Wouldn't it be great to have a quick and easy way to check capacitors without spending hours on testing?
As an engineer, you know the frustration of troubleshooting faulty components. You need reliable measurements, but finding the right device and method can be daunting.
Capacitors are crucial in many electronic circuits, so it’s important to know that they are working! Yet, testing them often feels like navigating a maze of confusing instructions and unreliable results.
In this guide, we'll simplify the process of testing capacitors. You'll learn straightforward techniques to quickly determine if a capacitor is in good shape or needs replacing.
Whether you're dealing with a simple multimeter or an advanced LCR meter, this guide will equip you with practical knowledge and tips to streamline your testing process. Say goodbye to guesswork and hello to efficient, accurate capacitor testing.
Let's dive in and simplify your troubleshooting tasks.
Why Do We Need to Test Capacitors?
Capacitors play a critical role in electronic circuits, affecting everything from signal filtering to power supply stabilization. Testing capacitors is essential to prevent equipment failure and ensure system reliability.
A faulty capacitor can cause significant operational downtime or even damage other components, leading to costly repairs and lost productivity.
Consider a scenario where a capacitor in a power supply fails. This can lead to voltage fluctuations, which may damage sensitive components downstream.
In industrial settings, such a failure might halt production lines, resulting in substantial financial losses and delays. In consumer electronics, a malfunctioning capacitor could render a device unusable, affecting customer satisfaction and brand reputation.
Routine capacitor testing offers both economic and safety benefits. By identifying and replacing failing capacitors before they cause problems, you can avoid unplanned downtime and expensive repairs.
Making sure your capacitors function correctly improves the safety of your equipment, reducing the risk of electrical fires or other hazards. Regular testing helps maintain the integrity of your systems, providing peace of mind and extending the lifespan of your devices.
Reliable Results Start with Reliable Tools
How to Safely Discharge a Capacitor
Handling charged capacitors comes with significant risks. A charged capacitor can deliver a severe electric shock or cause damage to other components if not handled properly. Discharging a capacitor safely is crucial before any testing or handling to prevent these hazards.
Step-by-Step Instructions to Safely Discharge Capacitors
- Identify the capacitor type: Different capacitors require different discharge methods. Electrolytic capacitors, commonly found in power supplies, store high voltage and need careful handling.
- Turn off power and isolate the capacitor: Ensure the power to the circuit is off, and the capacitor is isolated from the circuit. Remove the capacitor if possible.
- Use a resistor for discharging: For large capacitors, use a resistor with a high wattage rating (e.g., 10k ohms, 5 watts) to discharge slowly. Connect the resistor across the capacitor terminals using insulated alligator clips.
- Monitor the voltage: Use a multimeter to check the voltage across the capacitor. Wait until the voltage drops to near zero.
- Short smaller capacitors: For smaller capacitors, a resistor might not be necessary. Use an insulated screwdriver to short the terminals, but only if the voltage is low (below 50V).
- Confirm discharge: Double-check with a multimeter to ensure no residual charge remains.
Tools and Protective Equipment
- Resistor: High wattage resistor for controlled discharge.
- Multimeter: To monitor voltage.
- Insulated screwdriver: For shorting low-voltage capacitors.
- Insulated alligator clips: For connecting resistors.
- Personal protective equipment (PPE): Safety glasses and insulated gloves and boots.
Other Safety Precautions
- Avoid direct contact: Never touch capacitor terminals directly.
- Work in a safe environment: Ensure your workspace is dry and free of conductive materials.
- Understand the circuit: Familiarize yourself with the circuit and capacitor ratings before proceeding.
- Use proper tools: Only use tools designed for electrical work to avoid accidental shocks.
By following these steps and precautions, you can safely discharge capacitors, ensuring a safe working environment and protecting both yourself and your equipment.
9 Methods to Test a Capacitor
Testing a capacitor can be done using various methods, each suited for different scenarios and equipment. Here, we'll explore nine practical ways to test capacitors, starting with the simplest techniques and progressing to more advanced methods.
Method 1: Visual Inspection
Visually inspecting a capacitor can reveal immediate signs of damage, indicating whether further testing is necessary.
- Bulging: A swollen or bulging top usually suggests internal pressure build-up due to overheating or a short circuit.
- Leaking: Any liquid or electrolyte leakage points to a ruptured capacitor, often resulting from over-voltage or physical damage.
- Burn marks: Scorch marks or discoloration indicate overheating or electrical arcing, which compromises the capacitor's integrity.
Each of these signs generally means the capacitor is faulty and should be replaced to prevent further circuit issues.
Method 2: Use a Multimeter with Capacitance Setting
Using a multimeter with a capacitance setting provides an accurate measure of a capacitor’s capacitance, helping you assess its health.
- Setup: Ensure the capacitor is fully discharged. Set the multimeter to the capacitance mode, usually marked with a "C" symbol.
- Testing: Connect the multimeter probes to the capacitor terminals. For polarized capacitors, observe the correct polarity: the red probe to the positive terminal and the black probe to the negative terminal. Ensure a stable connection by holding the probes firmly against the terminals.
- Interpretation: Read the displayed capacitance value on the multimeter. Compare this value to the capacitor’s rated capacitance (usually printed on the capacitor body). A reading within ±10% of the rated value typically indicates a healthy capacitor. If the reading is significantly lower or shows as "OL" (over limit), the capacitor may be open or faulty. A much higher reading could indicate a shorted capacitor.
For demanding applications, consider using Keysight multimeters, known for their high capacitance ranges and precision, ensuring reliable measurements even in challenging scenarios.
Method 3: Use a Multimeter without Capacitance Setting
To perform a basic check using the resistance mode on a multimeter:
- Setup: Ensure the capacitor is fully discharged and set the multimeter to the highest resistance (ohms) range.
- Testing: Connect the multimeter probes to the capacitor terminals, observing polarity for polarized capacitors. Watch the initial resistance reading.
- Interpretation: A healthy capacitor will show a low resistance initially, then steadily increase to infinity. Constant low resistance suggests a shorted capacitor, while no movement (infinity) indicates an open capacitor.
- Limitations: This method does not provide a precise capacitance value and might not detect subtle issues like decreased capacitance or slight leakage. It’s best for a quick check rather than detailed analysis.
Method 4: Use a Voltmeter
Using a voltmeter allows you to check the charge stored in the capacitor:
- Setup: Charge the capacitor to its rated voltage using a power supply, then disconnect it from the power source.
- Testing: Set the voltmeter to the appropriate DC voltage range and connect the probes to the capacitor terminals, observing polarity for electrolytic capacitors.
- Interpretation: A capacitor that retains close to its rated voltage is likely healthy. A rapid voltage drop suggests a leaky or faulty capacitor, while no voltage indicates it cannot hold a charge and is likely open or damaged.
- Usefulness: This method is useful for troubleshooting power supply circuits and provides a quick indication of the capacitor's ability to hold and release charge
Method 5: Test by Measuring the Time Constant
The time constant (τ) of a capacitor is the time it takes for the voltage across the capacitor to reach approximately 63% of its final value during charging or discharging. This concept can be used to estimate capacitance.
- Concept: The time constant τ is given by the formula τ = R × C, where R is the resistance and C is the capacitance.
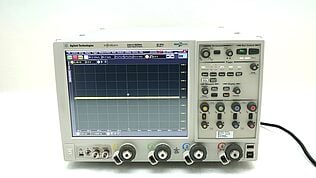
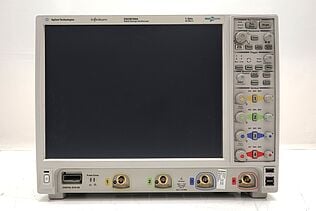
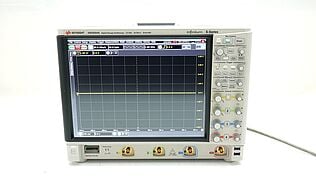
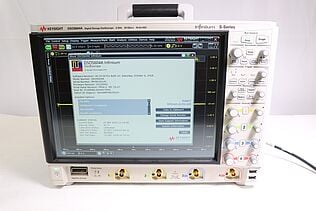
- Setup: Connect the capacitor in series with a known resistor R. Apply a voltage source to charge the capacitor and use an oscilloscope to measure the voltage across the capacitor.
- Testing: Start recording the voltage when the capacitor begins to charge. Determine the time it takes for the voltage to reach 63% of its maximum value. Use the formula τ = R × C to calculate the capacitance (C = τ / R).
This method provides an estimate of the capacitance by analyzing the charging behavior of the capacitor.
Method 6: Use an ESR Meter
Measuring the Equivalent Series Resistance (ESR) of a capacitor is crucial because high ESR values can indicate a degraded or failing capacitor.
- Importance: High ESR can lead to inefficient operation and overheating, potentially causing circuit failure.
- Setup and testing: Connect the ESR meter probes to the capacitor terminals, ensuring the capacitor is discharged before testing. Read the ESR value displayed on the meter.
- Interpretation: Compare the measured ESR value to the typical range for that capacitor type. High ESR values indicate a degraded capacitor.
Using an ESR meter provides a quick and effective way to assess capacitor health, particularly in power supply circuits where low ESR is essential. For precise capacitance and ESR measurements, consider using Keysight LCR meters, which offer high accuracy and reliability for demanding applications.
Method 7: Leakage Current Test
Performing a leakage current test is crucial for assessing the health of electrolytic capacitors, as it helps identify internal failures and degradation.
- Importance: Leakage current indicates the amount of current that leaks through the dielectric material of the capacitor. High leakage current suggests that the capacitor is failing or has degraded insulation.
- Setup and testing: Discharge the capacitor completely. Connect a DC power supply to the capacitor, ensuring the voltage is at the capacitor’s rated voltage, and include a series resistor to limit the current. Measure the current flowing through the capacitor using a multimeter set to the microampere (µA) range. Compare the measured leakage current to the capacitor's specifications. A significantly higher value indicates that the capacitor is faulty.
- Safety precautions: Always discharge the capacitor before testing to avoid electric shock. Use insulated tools and wear protective equipment such as gloves and safety glasses.
Method 8: Use a Capacitor Tester
Using a dedicated capacitor tester offers several advantages over other methods, providing more comprehensive and accurate testing.
- Advantages: Capacitor testers are designed specifically for measuring various parameters of capacitors, including capacitance, ESR, and leakage current. They provide precise readings and are often easier to use than general multimeters.
- Using a capacitor tester: Connect the capacitor tester probes to the capacitor terminals. Select the appropriate test mode on the device (capacitance, ESR, leakage current, etc.), and follow the device’s instructions to start the test. Read the results displayed on the tester and compare them to the capacitor’s rated values to assess its condition.
Capacitor testers streamline the testing process and provide reliable, detailed information about the capacitor’s health, making them invaluable tools for both professional and hobbyist electronics work.
Method 9: Traditional Shorting Method (For Professionals Only!)
Caution: This method is risky and should only be performed by professionals.
- High risk of electric shock: Handling charged capacitors without proper precautions can result in severe electric shock.
- Potential for equipment damage: Incorrectly shorting a capacitor can cause damage to the capacitor itself or other components in the circuit.
- Fire hazard: A sudden discharge of a high-capacity capacitor can generate sparks, posing a fire risk.
To perform the traditional shorting method, first ensure that the capacitor is fully charged. Using an insulated screwdriver, carefully short the terminals of the capacitor. Observe the resulting spark and sound.
- No spark or sound: This usually indicates that the capacitor is already discharged or faulty.
- Strong spark and loud pop: This suggests the capacitor is holding a charge and is likely functional.
This method provides a quick indication of whether the capacitor can hold and release charge but should only be used by professionals due to the associated risks.
Comparison of Capacitor Testing Methods
| Method | Best Applications | Pros | Cons |
|---|---|---|---|
| Visual Inspection | Initial quick check | Fast and easy, no equipment needed | Only identifies obvious physical damage |
| Multimeter with Capacitance Setting | General capacitance measurement | Provides precise capacitance value | Requires a multimeter with capacitance setting |
| Multimeter without Capacitance Setting | Quick, basic health check | Simple and easy, no special equipment needed | Does not provide precise capacitance value |
| Voltmeter | Troubleshooting power supply circuits | Quick indication of charge holding ability | Limited to checking voltage retention |
| Measuring the Time Constant | Detailed analysis for capacitors in circuits | Estimates capacitance through charging behavior | Requires oscilloscope and known resistor |
| ESR Meter | Assessing health of power supply capacitors | Measures ESR, quick and effective | Requires specialized ESR meter |
| Leakage Current Test | Checking electrolytic capacitors for degradation | Identifies internal failures and degradation | Requires DC power supply and safety precautions |
| Capacitor Tester | Comprehensive and accurate testing | Measures multiple parameters precisely | Requires dedicated tester, may be costly |
| Traditional Shorting Method | Quick check by professionals | Fast indication of charge holding ability | High risk of electric shock, equipment damage, and fire hazard |
How to Choose the Right Method for Your Capacitor
Selecting the right tools and equipment for testing capacitors depends on several factors, including the capacitor's type, capacitance range, and voltage rating. Using the appropriate method ensures accurate results and prevents damage to the components.
When choosing test methods, consider the following:
Capacitor Type
- Electrolytic capacitors: Use methods like leakage current tests or ESR meters to check for internal degradation.
- Ceramic capacitors: Visual inspection and capacitance measurement with a multimeter are often sufficient.
- Film capacitors: Time constant measurement or using a dedicated capacitor tester provides reliable results.
Available Test Equipment
- Multimeter: Suitable for basic tests like visual inspection, resistance check, and capacitance measurement.
- LCR meter: Ideal for detailed analysis, including precise capacitance, ESR, and leakage current measurements.
- Dedicated capacitor tester: Offers comprehensive testing capabilities and simplifies the process.
Purpose of Testing
- Initial check: Methods like visual inspection and basic multimeter tests are quick and easy for preliminary assessments.
- In-depth analysis: For a thorough evaluation, use advanced equipment like LCR meters and perform tests such as ESR measurement and leakage current testing.
Choosing refurbished equipment for testing can be beneficial, as it often provides high-quality performance at a lower cost. This approach allows access to advanced testing tools without a significant financial investment, ensuring precise and reliable results for various capacitor types and testing purposes.
Troubleshooting Tips
When capacitors fail tests or exhibit unusual behaviors, it’s crucial to diagnose and resolve the issues promptly to maintain system reliability. Here are some common troubleshooting tips:
- Verify connections: Ensure all connections are secure and that the multimeter or testing device is functioning correctly. Loose or poor connections can lead to inaccurate readings.
- Discharge capacitors properly: Always discharge capacitors before testing to avoid inaccurate readings and prevent electric shock. Use a resistor to discharge high-voltage capacitors safely.
- Check for physical damage: Inspect capacitors for visible signs of damage such as bulging, leaking, or burn marks. Physical damage often indicates that the capacitor needs replacement.
- Compare readings with specifications: Compare your test results with the capacitor’s rated values. Significant deviations indicate potential faults.
- Use correct test settings: Ensure you are using the correct settings on your testing device. Incorrect settings can lead to erroneous results.
- Test at different frequencies: For more accurate ESR measurements, test capacitors at different frequencies. Some capacitors may perform differently under varying conditions.
Common Issues and Resolutions
| Issue | Possible Cause | Resolution |
|---|---|---|
| No reading on multimeter | Loose connections | Secure all connections and retest |
| Incorrect capacitance | Capacitor not discharged | Discharge capacitor properly and retest |
| High ESR | Degraded capacitor | Replace capacitor |
| Inconsistent readings | Faulty testing equipment | Verify and calibrate testing device |
| Leakage current too high | Internal failure | Replace capacitor |
By following these troubleshooting tips, you can accurately diagnose and resolve common issues encountered during capacitor testing.

Capacitor Maintenance and Handling
Proper maintenance and handling of capacitors are essential for extending their lifespan and ensuring optimal performance. Here are some best practices to follow:
- Storage: Store capacitors in a cool, dry environment away from direct sunlight. Keep them in anti-static bags to prevent electrostatic discharge and physical damage. Ensure they are stored at a temperature within the manufacturer’s specified range.
- Handling: Always discharge capacitors before handling to avoid electric shock. Use insulated tools and wear protective gear such as gloves and safety glasses. Handle capacitors with care to avoid physical damage to the terminals or the casing.
- Installation: Ensure correct polarity when installing polarized capacitors like electrolytic types. Use appropriate tools to mount capacitors securely, avoiding excessive force that could damage the component. Verify the capacitor’s voltage and capacitance ratings match the circuit requirements.
- Routine testing: Incorporate capacitor testing into regular preventive maintenance schedules. Regularly test for capacitance, ESR, and leakage current to identify potential failures early. Replace capacitors that show signs of degradation or fail tests to prevent equipment downtime and damage.
Ensure Capacitor Efficiency and Reliability with Expert Testing
Proper capacitor maintenance and testing are crucial for reliable electronic performance. From visual inspections to advanced ESR measurements, using the right methods and tools can help you avoid common frustrations and ensure system longevity.
Keysight’s premium used products provide accurate, reliable testing solutions, addressing your fears of sudden failures and desires for quick, dependable results.
Invest in Keysight’s high-quality, affordable testing equipment to make capacitor maintenance accessible and efficient. With Keysight, reliable test results are both accessible and affordable, giving you the confidence to maintain your electronic systems.
Shop For Reliable Tools With Big Discounts
Select up to 3 instruments to compare
Enable Notifications
In order to use this feature, you need to enable notifications.
Manage notification preferences
Whenever You’re Ready, Here Are 5 Ways We Can Help You
- Browse our premium used network analyzers, oscilloscopes, signal analyzers and waveform generators.
- Call tech support US: 1 800 829-4444
Press #, then 2. Hours: 7am – 5pm MT, Mon– Fri - Talk to our sales support team by clicking the icon (bottom right corner) on every offer page
- Create an account to get price alerts and access to exclusive waitlists.
- Talk to your account manager about your specific needs

